 As I promised earlier, I’m writing about my experience with wax 🙂 I do not want to call this post as a tutorial because this is not a step-by-step instruction just a description of what I was doing in the kitchen that day :))
Materials
- Wax
- Pre-waxed candle wicks
- Mold for candles (clean chicken eggs and hollow plastic eggs)
- MARVY UCHIDA Candle Deco Paints
Tools:
- Saucepan
- Can, can-opener and pliers to make a pitcher
- Toothpicks
- Tape
- Scissors
Remember to never leave the double boiler unattended!!!

While wax was melting, I set up the wicks inside the egg molds, using split toothpicks and masking tape, to keep everything in place. For small candles I used emptied chicken eggs, for big ones – hollow plastic eggs from a Dollar Store.


Then carefully and slowly I poured the melted wax into prepared egg-molds.

Let the candles to cool and solidify at room temperature overnight.

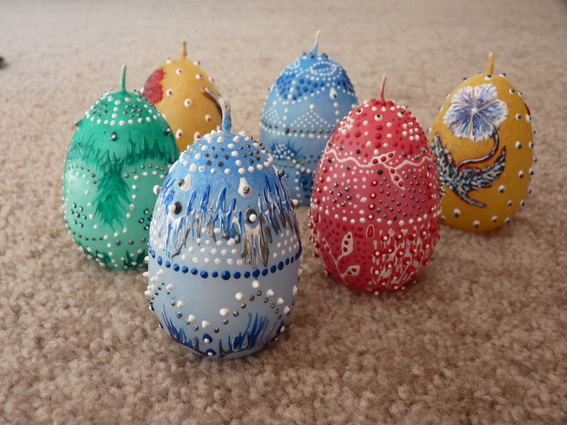
Then I removed the candles from the egg molds and decorated them using MARVY UCHIDA Candle Deco Paint. This is a great product, very easy to use. It is acid free/non-toxic (water based ink) liquid wax.
To paint egg backgrounds I worked with a piece of sponge. Then I created ornaments in point-to-point technique, and let liquid wax dry for approximately 24 hours.

Finally, I trimmed the candle wicks to 1/4″ and placed candles on a heat-resistant surface.


Making these candles was fun. Hope you also enjoy it 🙂


0 Comments